Part 1: Getting Started with PaySensei - Account Setup & Onboarding
Foundation Setup
🚀 Welcome to PaySensei!
Start your transformation journey here. This part will guide you through creating your account, completing onboarding, selecting the right subscription plan, and understanding our security features.
By the end of this section, you'll have a fully configured PaySensei account ready for managing your students and payments.
What You’ll Accomplish in Part 1
Your Setup Checklist
Account Creation & Registration
PaySensei offers two quick and secure registration methods to get you started immediately:
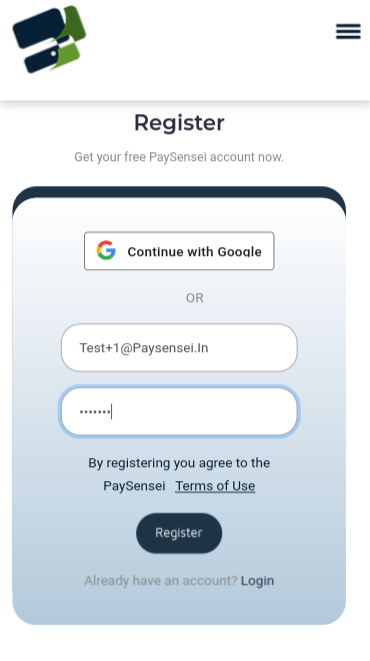
Email Verification Process
If you choose email registration, follow these simple steps:
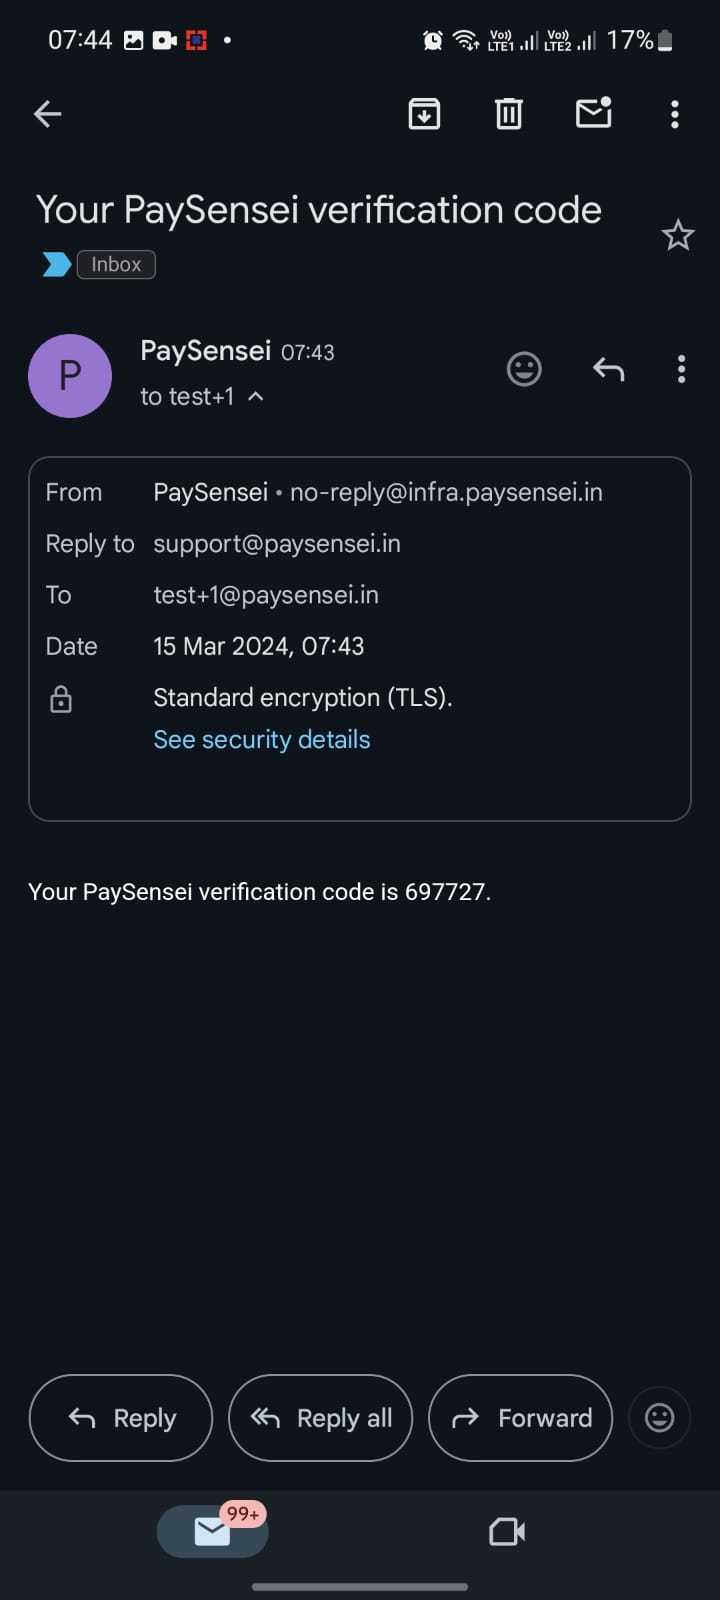
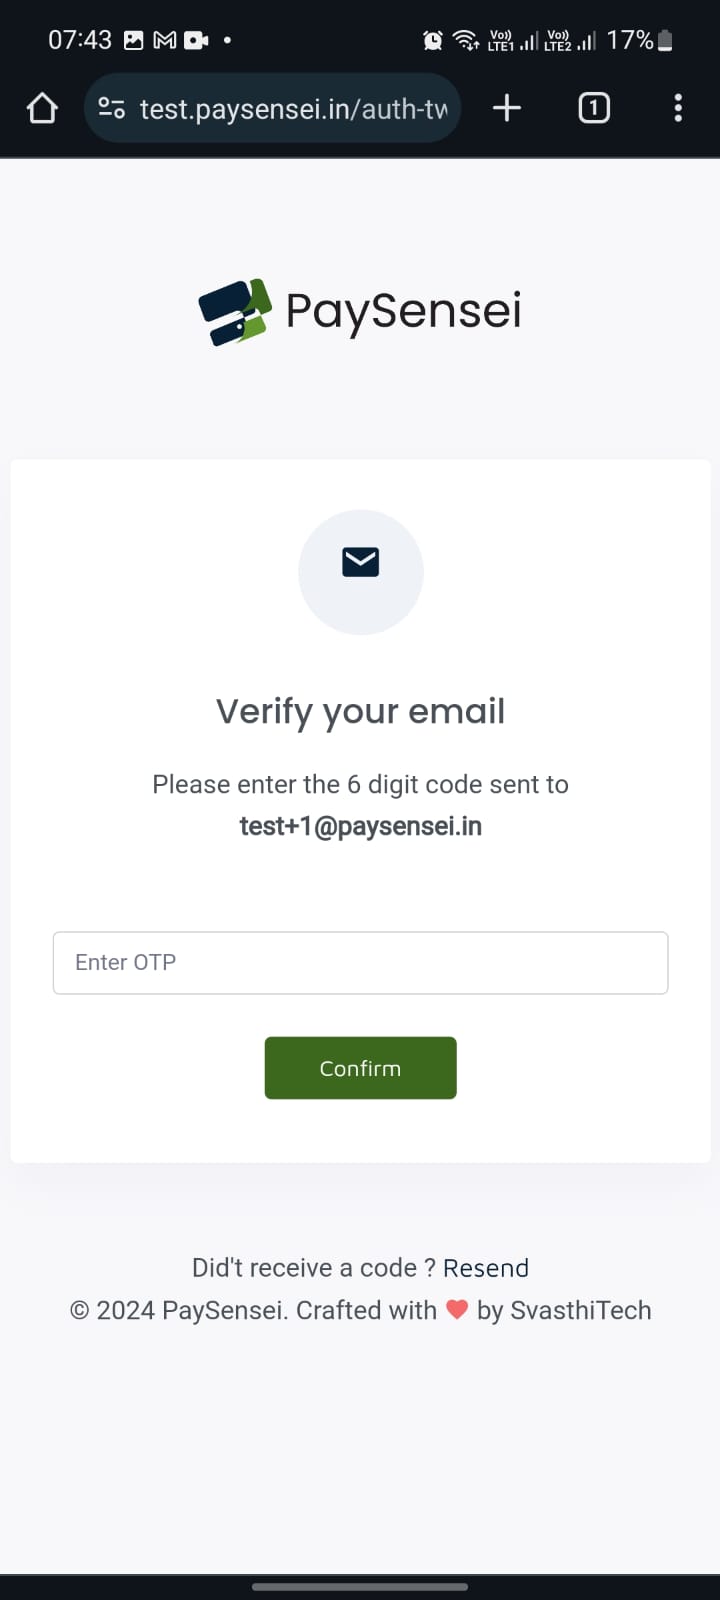
Pro Tip: Check your spam folder if you don’t receive the OTP within 2 minutes. The verification code is valid for 10 minutes.
Once registered, you’ll have immediate access to your PaySensei dashboard with all payment tracking features activated.
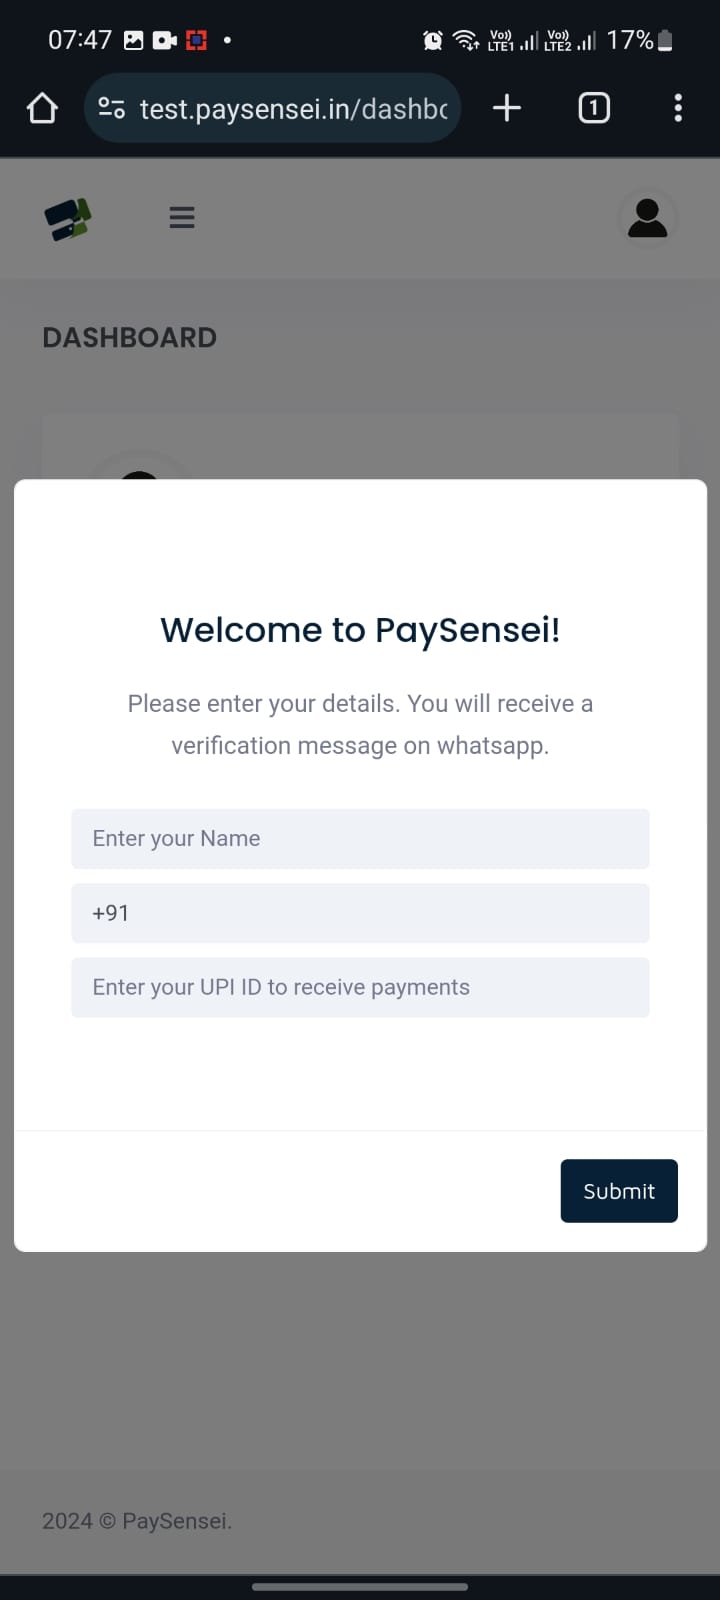
Complete Your Profile Setup
After successful registration, you’ll be guided through a comprehensive onboarding process to configure your account:
Personal Information
- Enter your full name as it should appear on receipts
- Add your active WhatsApp number for verification
WhatsApp Verification
- Open WhatsApp and verify to enable notifications
- Get instant payment confirmations
WhatsApp Integration Setup
WhatsApp integration is crucial for automated communication:
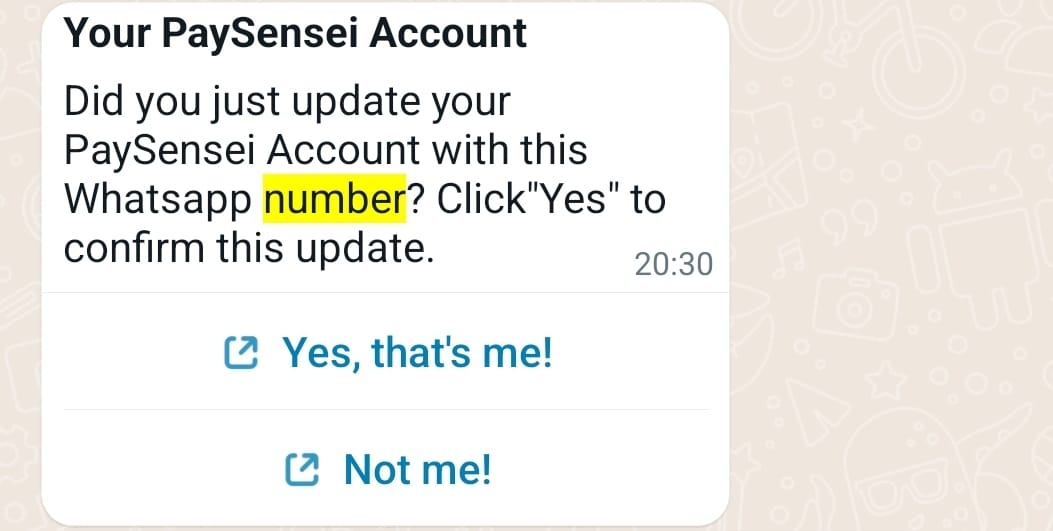
Important: Make sure to click the verification link sent to your WhatsApp. This enables:
- Payment confirmation notifications to you
- Emergency notifications about account activity
Choose Your Subscription Plan
PaySensei offers flexible subscription options with a generous 2-month free trial for all plans:

Subscription Options
Monthly Plan
Best for: New tutors or those with seasonal batches
- Flexible month-to-month billing
- No long-term commitment
- Cancel anytime
- Full feature access
Annual Plan
Best for: Professional coaching institutes
- Save 20% on yearly subscription
- Maximum cost savings
- Annual business planning
- Premium support included
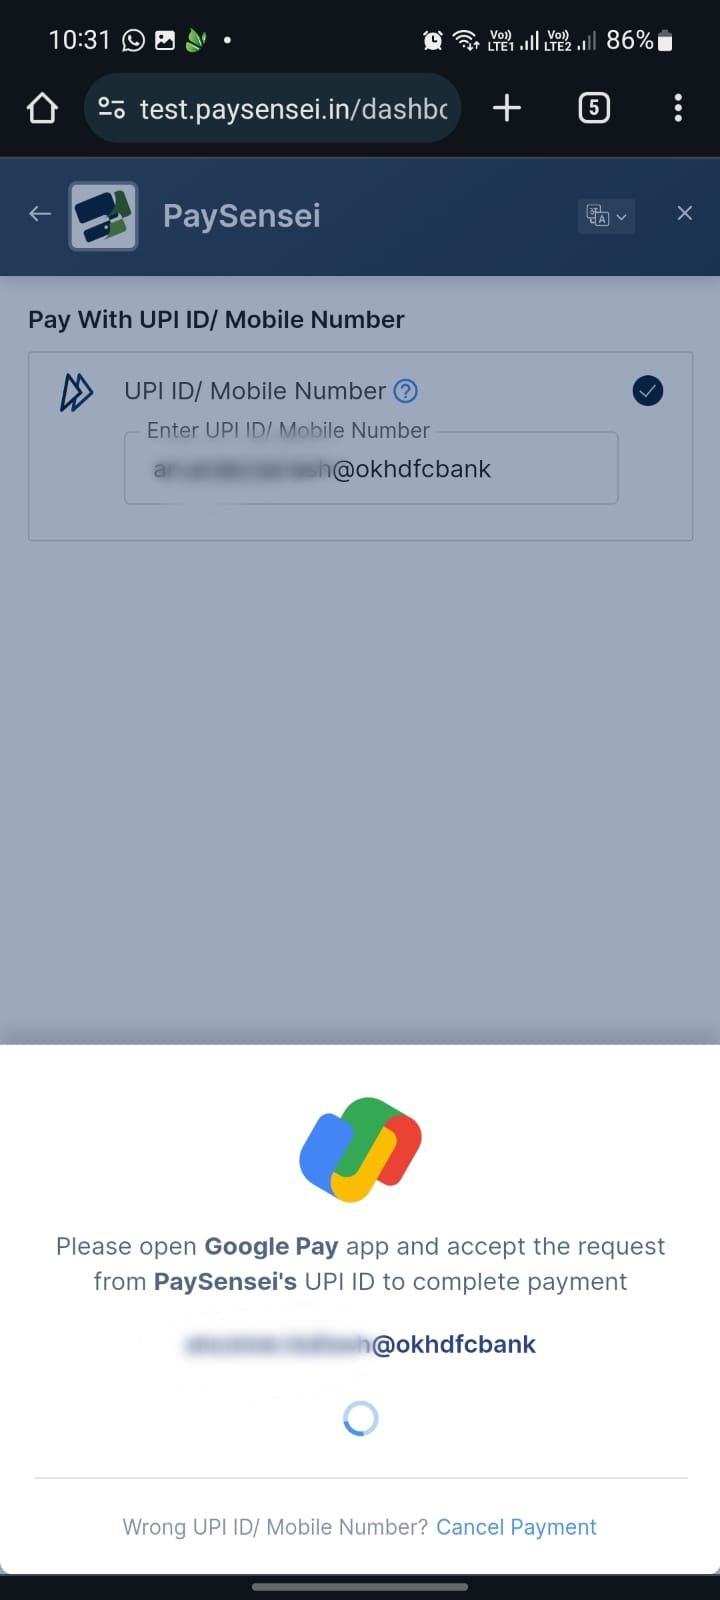
Payment Verification Process
During plan activation, PaySensei performs a small verification:
- A refundable ₹5 transaction verifies your payment method
- This amount is instantly refunded to your account
- Ensures your payment setup works correctly
- No hidden charges or additional fees
Free Trial Benefits:
- Full access to all features for 2 months
- No automatic charges during trial period
- Easy upgrade when you’re ready
Security & Privacy Protection
PaySensei prioritizes the security of your data and payments with enterprise-grade protection:
Authentication & Data Security
- AWS Cognito: Best-in-class authentication powered by Amazon Web Services
- Data Ownership: Your data is yours - strict protocols prevent unauthorized access
- Encryption: Bank-level encryption protects all sensitive information
- Compliance: GDPR and Indian data protection law compliant
Payment Security
- Razorpay Integration: India's leading payment gateway secures all transactions
- Multiple Options: UPI, debit/credit cards, net banking support
- Secure Links: Encrypted payment links for safe student transactions
- No Storage: PaySensei never stores sensitive payment information
What This Means for You
✅ Complete Privacy: Student payment information is never shared or sold
✅ Secure Transactions: All payments use bank-grade security protocols
✅ Data Protection: Your business data is encrypted and backed up securely
✅ Compliance: Meets all Indian financial and data protection regulations
✅ Transparency: Clear privacy policy explains exactly how data is used
Congratulations! You’re Ready for Part 2
Quick Reference
Need Help?
- 📧 Email: support@paysensei.in
- 📱 WhatsApp: +91 79940 29939
- 🌐 Help Center: PaySensei.in/help
What’s Next?
- Part 2: Master your dashboard and navigation
- Part 3: Set up student batches and management
- Part 4: Configure payment tracking and reminders
Part 1 of 5 - PaySensei User Guide | View All Parts